Best Camera Setup for Filming Art Tutorial Videos
I’ve had an surprising number of inquiries lately regarding my camera setup for filming the popular Art Masterclass Series which has prompted me to provide an in-depth insight into the technical aspects that aloow me to do the filming successfully.
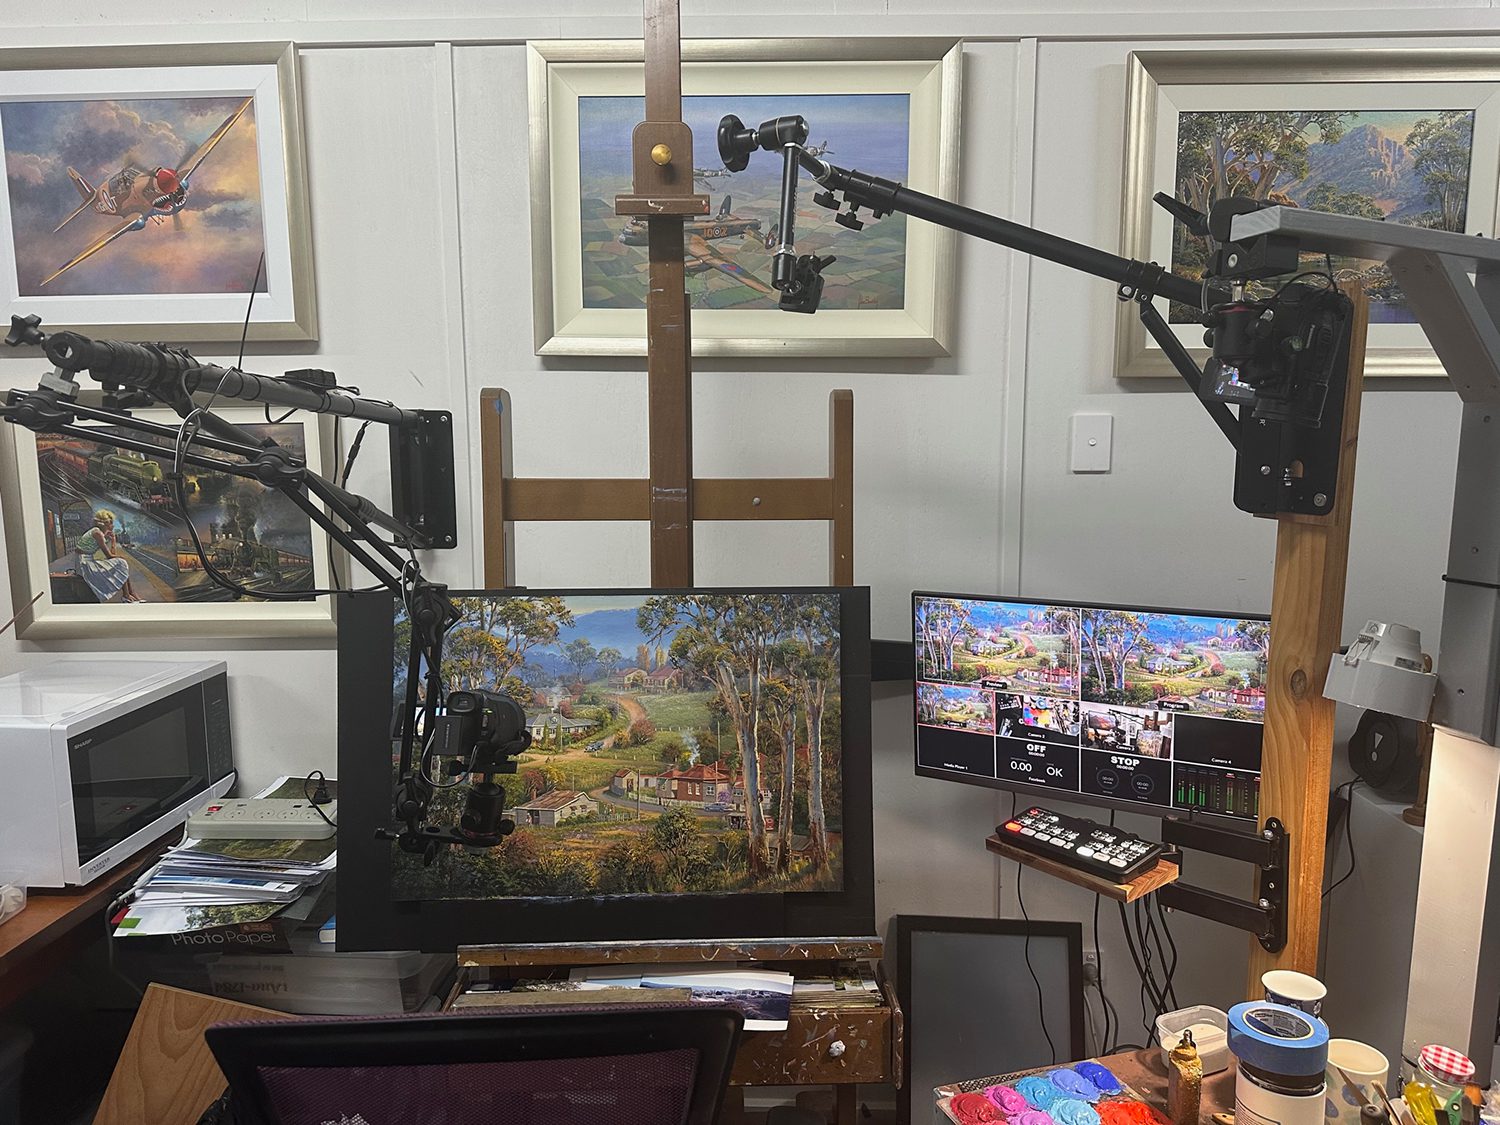
In my world of art instruction, the heart of my Masterclass videos lies in my camera setup. With a commitment to delivering the best possible instruction for artists, I’ve carefully integrated an arrangement of cameras, a switching box, and a monitor screen to capture each brushstroke, colour mix, and technique demonstration. In this article, I share the details of my camera setup, offering insight into the technology that enhances the learning experience for aspiring artists.
First Camera: Revealing Every Brushstroke
My camera setup revolves around three distinct cameras, each with a unique role. The first camera hovers directly in front of my canvas, allowing viewers an intimate view of my painting technique. As my brush moves across the canvas, this camera captures every stroke, every colour blend, and every detail. Its precision provides a direct window to watch the step-by-step process of the blank canvas becoming a landscape painting.
Second Camera: Capturing the Magic of Colour
The second camera focuses on my oil palette, a vital aspect of my creative process. This camera plays a crucial role in capturing the process of colour mixing—a fundamental skill for any artist. By showcasing the subtle nuances of pigment combinations and the techniques I use to blend colours, this camera lets viewers in on the intricacies of creating harmonious palettes that breathe life into my artwork.
Third Camera: Perspective of my Space
Completing the artistic trio, the third camera offers a broader view of my studio setup, capturing not just my canvas, but the artist. Positioned to include my easel, palette, and workspace, this camera offers viewers a comprehensive understanding of my environment. This vantage point provides context to my techniques, which hopefully allows audiences to duplicate my creative process.
The Ingenious Arm System: Unobtrusive and Seamless
The feature I am most proud of in the whole camera setup is the innovative arm system supporting the first camera. Designed to be unobtrusive, this system allows the camera to hang over my left shoulder, ensuring it doesn’t hinder my movements while painting. This arrangement exemplifies my commitment to maintaining an unencumbered creative flow while maintaining a dynamic and informative filming angle.
Behind the Scenes: Exploring the Setup on YouTube
For those seeking a deeper dive into the technical aspects of my camera setup, I’ve created a YouTube video that provides an in-depth exploration. This video breaks down the types of cameras I use, the mechanics of the arm system, and the role of the switching box and monitor screen. You can watch the video here below.
I have tried to use the camera setup in my studio to provide an immersive art instruction experience. Through the combination of cameras, innovative arm systems, and technical components, I invite aspiring artists to join me on this artistic journey, learn, grow, and master the art of painting.
ABOUT JOHN BRADLEY – John A. Bradley has worked as a professional artist for over 30 years and ran his own successful Art School in Sydney for 15 years.
If you are interesting in joining John Bradley’s Masterclass sessions click here: Masterclass Videos